Showing posts with label Art Projects. Show all posts

Thursday, January 30, 2014

Creating Art in the Classroom

This year I've come to realize that when I've done art in the classroom, it would more accurately been called "crafts!" I never realized there was more to 1st/2nd grade art than crayons, construction paper, and tempera paint. My school is currently between art teachers and I've volunteered to teach art to my own class during this time. Additionally, I've had some time to observe art teachers, and explore a bit of youth art projects on my own. Here is a peek at two of my favorite projects.

Project #1: Kandinsky
This one is by far my favorite! The kids loved every moment of this lesson today! Earlier this week I had the opportunity to watch a wonderful art teacher teach a lesson on Kandinsky's Farbstudie Quadrate. She played lovely music and had the kids paint circles. She had extra materials so I was able to participate and make my own painting. Check out my painting on the left! I love it so much I plan on framing it!

This inspired me to use the same techniques to create a Valentine version with my own class today! You can see my demonstration picture for the kids on the right. I played my Mozart Pandora station and painted with my class today.


Materials:
  • white construction paper
  • oil pastels
  • water colors
  • painters tape
How to:
  1. Tape the edges of white construction paper with painters tape. This creates the nice white border when you're done.
  2. Using oil pastels, start with a small heart in the middle of the page. I prompted the kids to draw a question mark shape, then draw a backward one on the other side. This seemed to help kids who didn't know how to make hearts. 
  3. Then create larger hearts around it, keeping space between some of the heart outlines (this leaves space to paint with water colors later).
  4. Leave space around the outside to create a nice background. 
  5. Paint with water colors in the white spaces and over the top of the oil painted sections. The layers of color make a wonderful effect!
  6. Leave the painters tape on until the papers are completely dry or it will rip the page. 


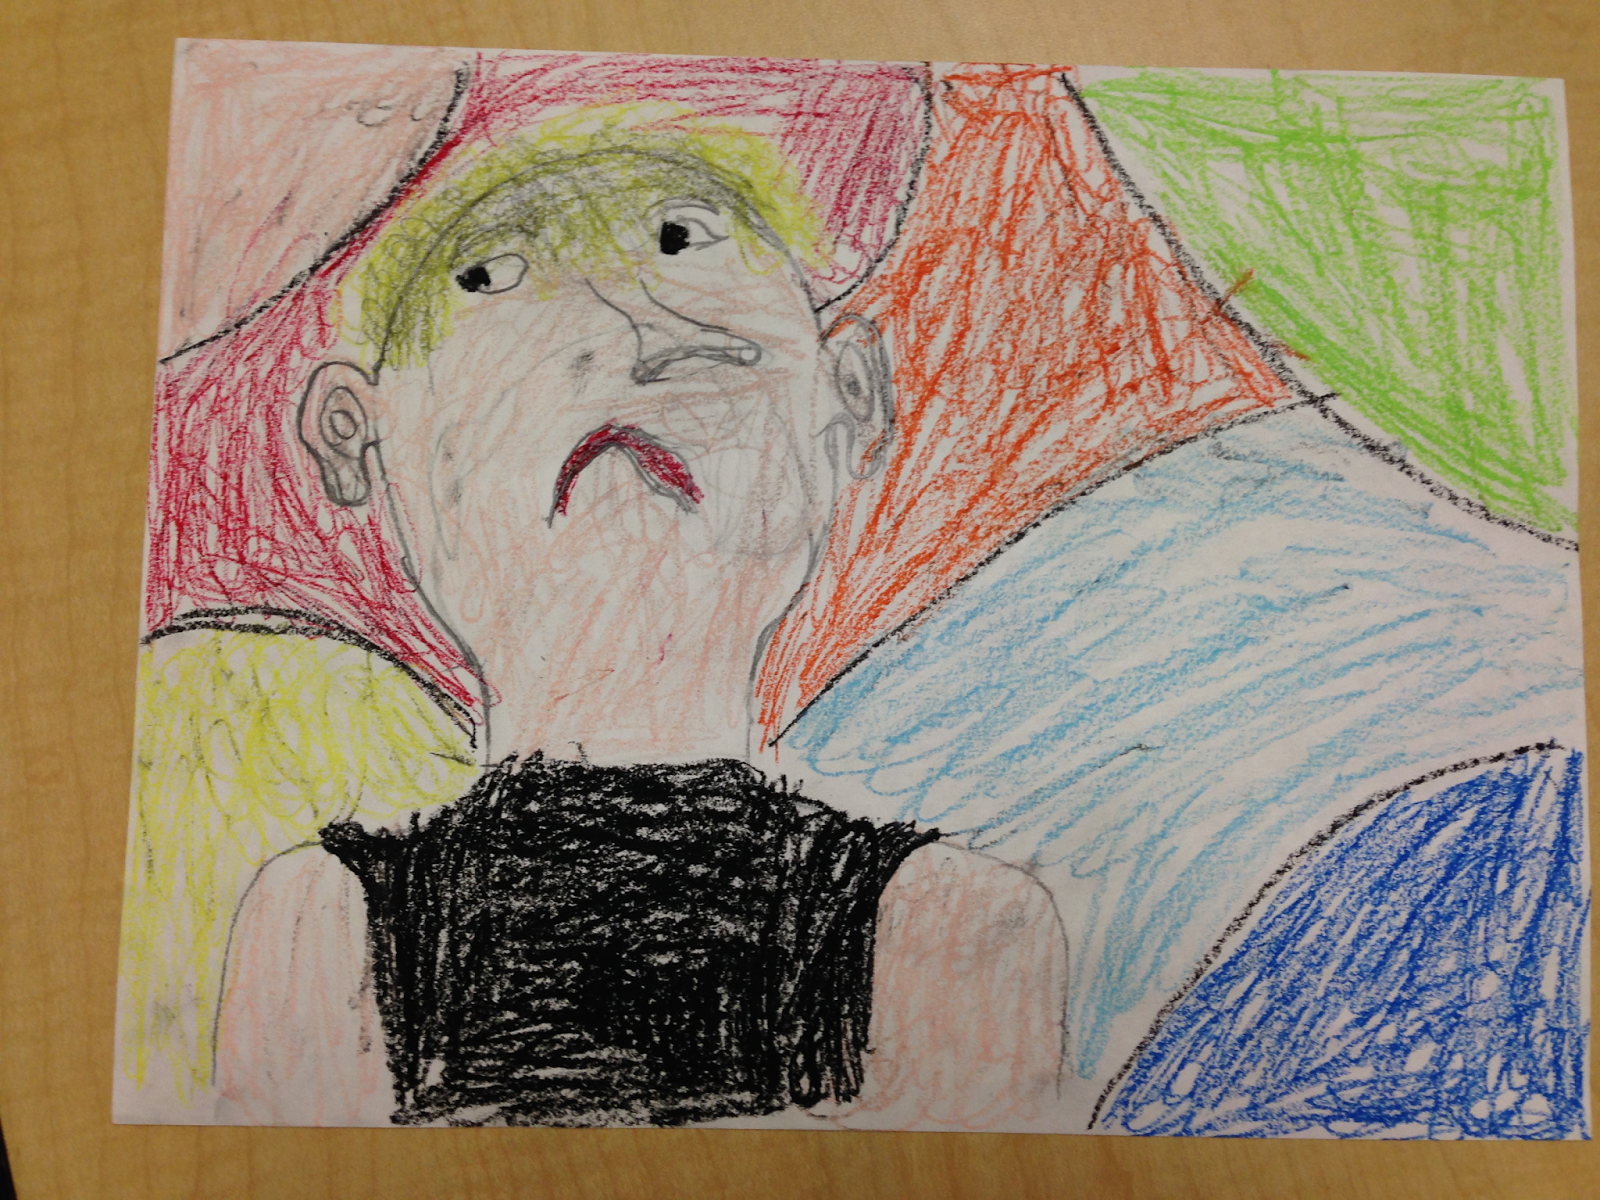
Project #2: Picasso
Please forgive my lack of artistic ability on this one. I drew it in approximately 2 minutes to demonstrate for my class!! The kids thought this was the coolest, most fun project ever! I have a whole class of wild and silly boys, so this was right up their alley!
Materials:

  • iPad or computer with photobooth application
  • White construction paper
  • Oil pastels or crayons

How To:

  1. Open Photobooth on iPad and take a self-portrait using one of the three photo styles on the right side of the screen such as swirl. This helps kids see what they would look like with their facial features in the wrong places.
  2. Use a pencil to draw the outline of the head and facial features.
  3. Use oil pastels to color and add in details.
  4. Color a bright, colorful background behind the head!


Enjoy your class of beautiful art work!!

Wednesday, December 4, 2013

Fun News + Easy Snowman Craft!

Happy Holidays!! I've started to get into the holiday spirit. Perhaps it's the flash mob dance my school staff practiced today to surprise the kids at our holiday assembly later this month. My dancing abilities are severely limited, but it was fun none the less!

Time for some exciting news!!
I found out my former student, as you have come to know as "Genius Boy," is now working with MICHELLE GARCIA WINNER!!! She is my special ed idol and my kiddo gets to work with her!  He is so lucky!! If anyone can help him, it's her!

For those of you who haven't been long time followers, I'll catch you up... Genius Boy is by far the most brilliant child I've ever met, let alone taught!! The struggle was his autism spectrum disorder caused a HUGE discrepancy between his social and academic skills. Super high in one, and super low in another. His brain mesmerized me every single day. It was fun to see what kind of things I could do with him. He also gave me the opportunity to test every single behavioral strategy I'd ever heard of...and then some! I couldn't be more happy for him! I love the family so much that I still see them despite changing schools. Yay!

CRAFT TIME!!

Our art teacher is no longer on staff (long story!) and there isn't a replacement just yet. I volunteered to be the art teacher for our classroom in the mean time. This has actually been a really fun little gig. All those art projects I tend to decide aren't "educational" enough can now be done freely! 

My school is anti-holidays. It's torture for me! In the past I was allowed to teach all the holidays for one week each. We did both Hannukah and Christmas crafts so all was fair. This school the word "Christmas" is like a curse word. I get it, we have several Jewish kids, but boy does it ruin my holiday crafts I've done for years!! Time for gingerbread and snowmen! I had to get a little creative to come up with a craft that was non-denominational and also easy to do, with easily ready supplies. Also we are supposed to decorate our doors. I created a "snowman snow globe" craft that we can tape to our door.

SNOWMAN SNOW GLOBE HOW-TO
Supplies (all found at Target)
  • Cotton balls
  • Fine white glitter
  • Colored paper plates (helps the "snow" show better)
  • Decorations (Target Dollar Spot)
  • Plastic Wrap
  • Liquid Glue (Elmers)
  1. Spread glue on the bottom section of the paper plate.
  2. Pull apart 2 cotton balls to make them more thin and "snowy," then place them on the glue
  3. Glue/stick on the candy cane and snowman decorations. If you cannot find these, kids can draw or paint them on. Another option would be to make them of paper separately and then put them on.
  4. Put small glue dots around the top to make it it look like flakes of snow.
  5. Sprinkle fine white glitter over the whole plate. It sticks heavily on the glue dots, but it all sticks lightly on the cotton and plate which makes it extra pretty!
  6. Let dry, then cover the whole plate with plastic wrap to make the "snow globe" effect. The bigger the piece, the easier it is to get the plastic to stay on. Taping it down works well too.


Tuesday, September 17, 2013

Lady Bug Art and Finding Dozens of Caterpillars

Our insect theme unit is coming along nicely. Yesterday we did an art project using the knowledge we've learned about insects. The kids made an outline of a ladybug and then we filled it in with torn paper. I made this a step-by-step directions activity so the kids didn't get lost or my messy blobs that don't show what we've learned. Take a peek at our project!
(Skip to the bottom to see the MASSIVE amount of caterpillars found outside our classroom!)

1) Draw the outline of the ladybug with 3 body sections. For sizing it was easier for kids to start with the large abdomen, then move on to the smaller thorax, head, antennae and legs. 
Draw: abdomen, thorax, and head
2) Tear up scraps
3) Spread glue all over the outline (within the lines)
4) Put colored scraps in each section


Some finished products with zero teacher assistance!

Now for the excitement of our day today! 


We are the 1st/2nd classroom, but there is a K-1 classroom that just so happens to be studying insects this month too. One of the teachers came to tell me they found a massive amount of caterpillars on a pole right outside our door.

I went to look and I've NEVER seen anything like it!! There were dozens of caterpillars in various stages of the life cycle all hanging out together on this one cement pole (nowhere near a plant!)!!!! A science lesson dream come true!
Two caterpillars and a chrysalis
Just SOME of the caterpillars on the pole. Look closely to see some cocoons are empty/hatched
This moth was on the pole too, so I predict it came out and was drying it's wings, but I could be wrong.

Two empty cocoons
We collected two empty chrysalis (no idea the plural on that one!) to observe and see what they looked like. I also gently plucked one off the pole so we can (hopefully) see it hatch soon! I also took a caterpillar and put it in our classroom so hopefully it will form a chrysalis for us. We did see one wiggling on the pole forming one today, which was pretty exciting!

Do you study life cycles in your class? Which insects do you use?
Related Posts Plugin for WordPress, Blogger...